Learn to make predictions in Snowflake using pre-trained models in TensorFlow Hub. In this short tutorial, Associate Data Engineer Preston Blackburn will explain how to create custom state-of-the-art models using both tools.
Tensors right on your data, bruh.
In this post, I’ll use TensorFlow Hub to download a pre-trained model and use it to make predictions in Snowflake. Integration with TensorFlow hub and Snowflake allows you to run state-of-the-art models directly on your data.
To run the model directly in Snowflake, we’ll take advantage of Snowflake UDFs (User Defined Functions). Snowflake UDFs allow you to create custom functions to perform operations that are not available through the functions provided by Snowflake. UDFs can be created in various languages, but in this case, we’ll use python. A similar process can also be used to load custom or tuned models created in TensorFlow.
Pre-requisites:
- Snowflake trial account
- SnowSQL
- Python (preferably with Anaconda)
Step 1: Selecting a model in TensorFlow Hub
There are a few considerations to keep in mind when selecting a TensorFlow Hub model to use in Snowflake. First off, a Snowflake UDF will not have a public internet connection. This means that we will need to download the TensorFlow model instead of specifying the model URL.
Since we will be downloading the model and supplying it to Snowflake we need to consider the size of the model. If the model is too big the Snowflake UDF will not be able to load it. The size limit is not listed anywhere, but if UDFs are based on serverless functions like AWS Lambda functions, the size limit will be around 500MB.
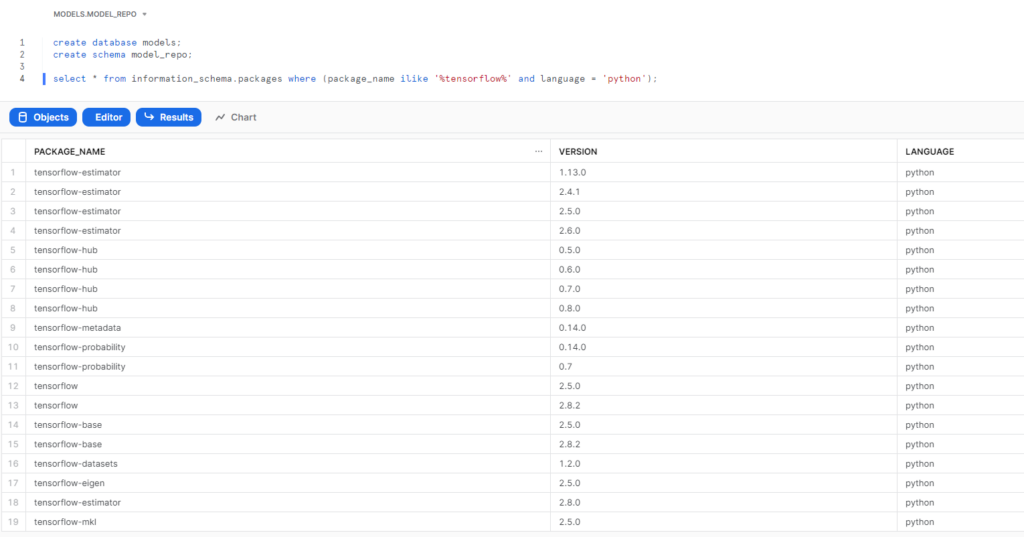
For this example, I’ll use the Universal Sentence Encoder Lite encoder. Next, we need to make sure that the model only uses packages supported by Snowflake. Because Snowflake uses an Anaconda environment with a ton of pre-installed packages, you need to query the available TensorFlow packages. You can run this query from a Snowflake worksheet:
Once we have determined that the model is supported, we can download the TensorFlow Hub model locally.
Step 2: Prep + Upload the Model To Snowflake
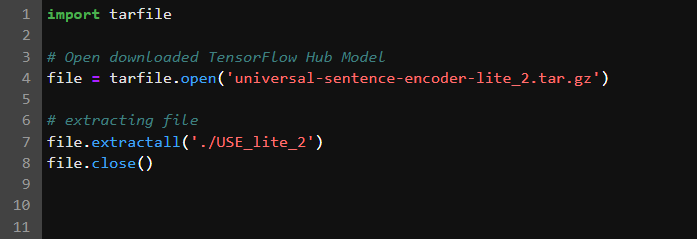
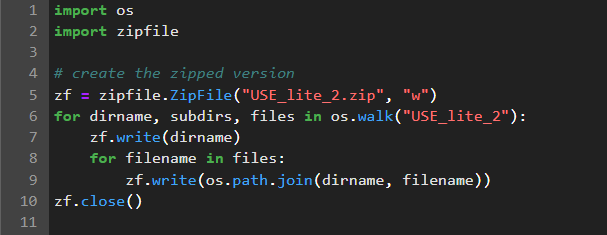
The TensorFlow model will be compressed as a .tar.gz. However, we want to use .zip compression since that seems to be the preferred method in the Snowflake docs. There are various ways to uncompress and compress files, but we’ll use Python again.
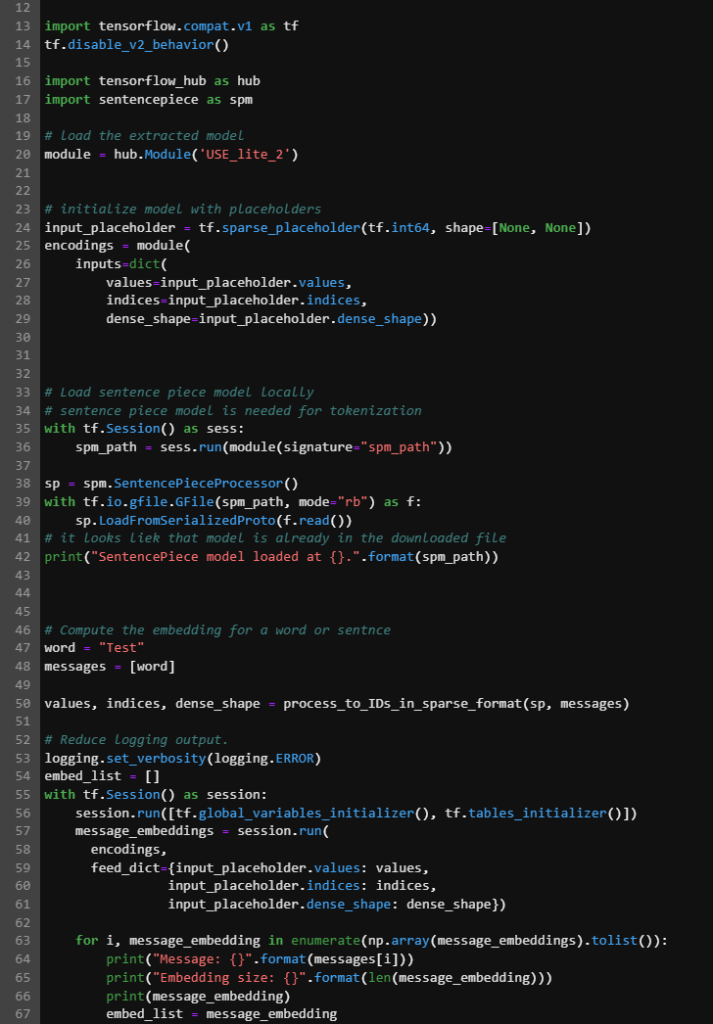
We’ll also make sure that the model is working after it has been unzipped in the script below. This will also come in handy when we create our script for the Snowflake UDF.
If the model is working, create a zip package:
Then, we can upload the zipped model to a Snowflake stage using SnowSQL.
We need to create a Snowflake stage before we can upload the model file. In a Snowflake worksheet you can run the following code:
create stage model_repo;
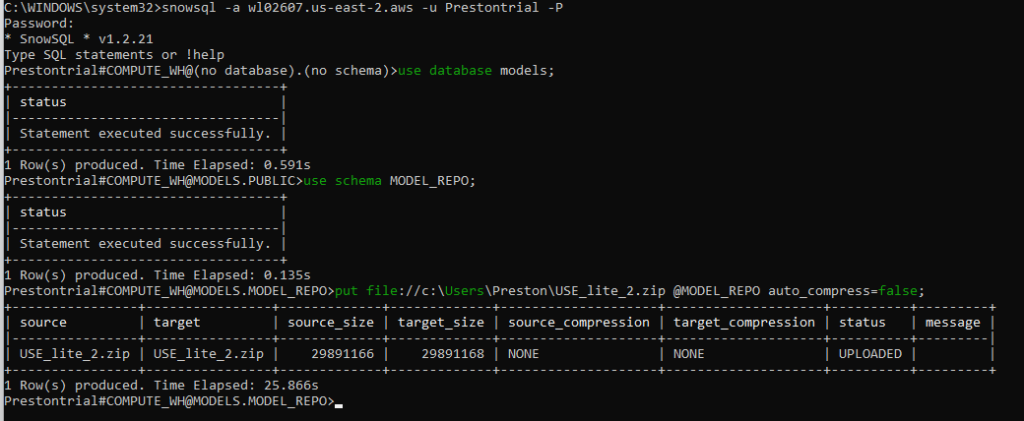
We can also upload the file using Snowsql from the command line:
To connect to Snowflake from SnowSQL:
snowsql -a wl02607.us-east-2.aws -u Prestontrial -P
Enter your trial account password when prompted and select the database and schema where you want the model to be saved. The final step is to use the PUT command to upload the file (this can take a while for large models).
Now that we have the model in Snowflake, we just need to create a UDF to use it.
Step 3: Create the Snowflake UDF
Before you can create the UDF you need to enable Anaconda python packages for your trial account by following these steps from Snowflake.
Once you have enabled Anaconda packages, you can create the Python UDF. The main components of the UDF are
- Specify the imports and zip files to load
- Start the UDF and import packages
- Read the zipped file from stage
- Save the zipped file locally to the UDF “/temp” folder
- Read the zipped model file
- Use the model for inference for the the input to the UDF
- Output an array of embeddings
For more information, see the full code on my Github page.
Step 4: Create your own models with Tensorflow Hub
Using a similar process, you can train and load your own TensorFlow models directly into Snowflake.
Article originally published by Preston Blackburn in his LinkedIn profile.